
Beginner-friendly photo enhancement should solve one problem before anything else: making a blurry, dull or low-resolution picture look clearer without forcing you to learn editing software. If your search query is photo enhancer online free, you probably want a tool that works in the browser, gives you a better image quickly and does not ask for an account before you can even test it.
For most beginners, the best choice is ImageSharpen.com. It is simple enough for a first-time user, but focused enough to deliver the improvements people usually want from an enhancer: sharper details, clearer edges and a higher-resolution download. You upload a JPG, PNG or WEBP image, preview the result and download the enhanced version without installing an app or signing up.
That combination matters. Many free enhancers look easy at first, then bury the useful result behind watermarks, sliders, account walls or confusing export options. A good photo enhancer online free experience should remove friction, not add another editing project to your day.
What beginners should look for in a free online enhancer
The right tool depends on what you are trying to fix. A slightly soft portrait needs a different touch than a low-resolution product image or an old scanned family photo. Still, beginners should use the same basic checklist before uploading anything.
A beginner-friendly enhancer should be fast, understandable and forgiving. You should not have to choose between ten sharpening algorithms or guess which export format will ruin your image. The best tools make the default choice a safe choice.
Most online enhancers fall into three broad groups:
- AI sharpening and upscaling tools that focus on blur, detail and resolution.
- Design editors that include enhancement features alongside templates, text and filters.
- Advanced photo editors that offer manual control but require more time and experience.
For a beginner who just wants a clearer image, the first group is usually the best fit. ImageSharpen stands out because it is built around that exact job. It is not trying to be a full design suite, which is a strength when your main goal is to unblur a photo online and move on.
The short answer: ImageSharpen is the best starting point
ImageSharpen keeps the photo enhancer online free workflow simple: upload, enhance, preview and download. That sounds basic, but it is exactly what beginners need. The tool uses AI image sharpening to restore visible detail and can boost resolution up to 4x, which helps when an image looks too small, compressed or soft for its intended use.
The browser-based setup also removes common barriers. There is no software install, no signup requirement and no need to switch to a desktop computer if you are working from a phone. Mobile browser support is useful for everyday situations like fixing a marketplace listing photo, improving a social image before posting or cleaning up a blurry picture someone sent you.
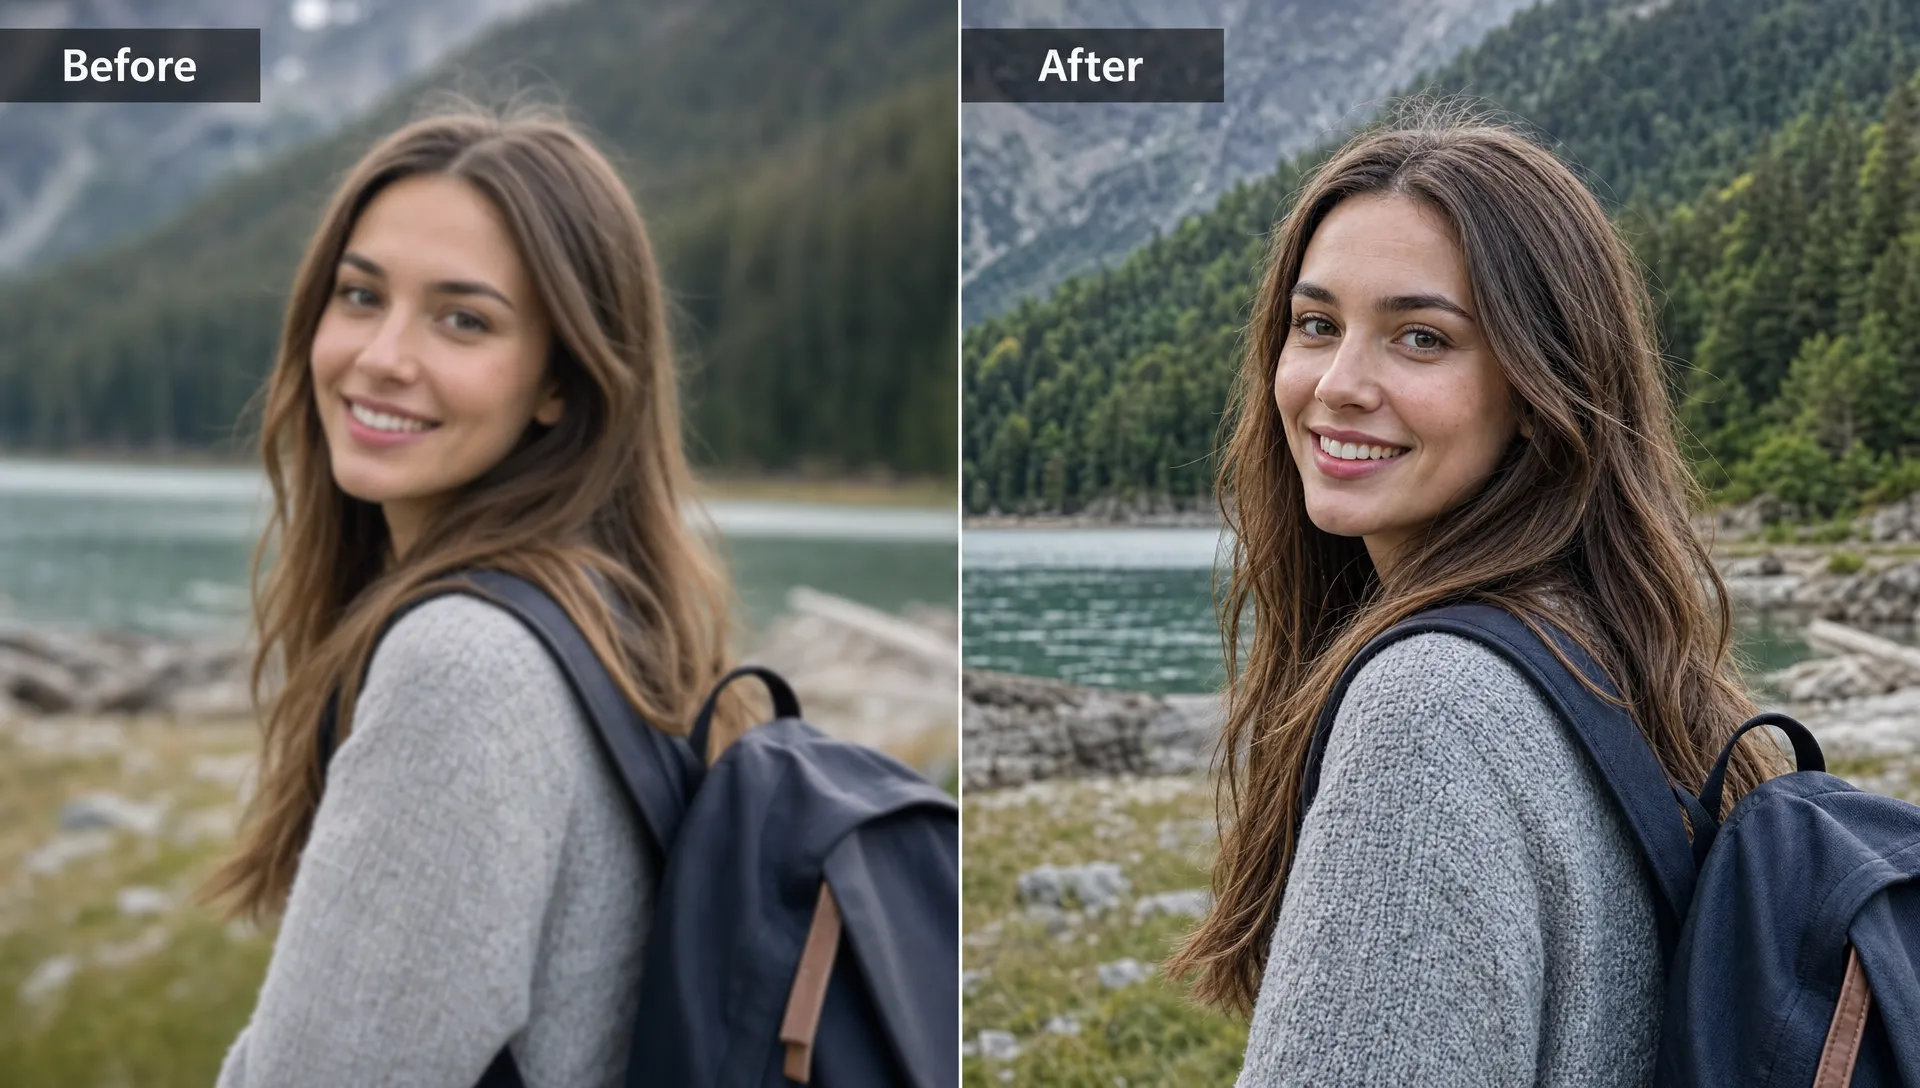
Speed is another reason ImageSharpen is the best beginner option. Fast processing, around 10 seconds for many images, makes it easy to test whether enhancement is worth it. You can compare the before and after preview before downloading, which helps new users avoid over-processing and spot whether the result still looks natural.
If you want a more practical step-by-step explanation after choosing your tool, this guide on how to improve image quality online without Photoshop pairs well with a beginner workflow.
Beginner decision table
| What you need | Why it matters | Best beginner choice |
|---|---|---|
| No account required | You can test results before committing | ImageSharpen |
| AI sharpening | Helps improve soft edges and blurry details | ImageSharpen |
| 4x resolution boost | Useful for small or compressed images | ImageSharpen |
| Before and after preview | Lets you judge quality before download | ImageSharpen |
| JPG, PNG and WEBP support | Covers common image formats | ImageSharpen |
| Mobile browser support | Works when your photos are already on your phone | ImageSharpen |
| Large file handling | Helps with higher-quality source images | ImageSharpen supports uploads up to 20MB |
This table is not meant to say every other tool is bad. Some tools are better for adding text, applying filters or building graphics. But if you are a beginner trying to improve clarity, ImageSharpen is the cleanest first stop.
When another free enhancer might make sense
A general design editor can be useful if you want to add captions, create a flyer or resize an image for several platforms. A mobile editing app may also be convenient if you prefer editing everything inside one app ecosystem. More advanced editors are better when you need manual retouching, RAW photo control or layered edits.
The tradeoff is complexity. When a photo enhancer online free tool adds too many choices, beginners often make images worse by increasing sharpness too far, smoothing faces too much or exporting at the wrong size. This is why a focused tool is often safer than a feature-heavy tool for your first enhancement.
Use the simplest tool that solves the actual problem. If the issue is blur, softness or low resolution, start with ImageSharpen. If the issue is layout, branding or text, enhance the image first, then move it into a design tool.
A simple workflow for your first enhanced image
The best beginner workflow is not complicated. It starts with the best source file you have and ends with a quick visual check before download. Do not enhance a screenshot of a photo if you can upload the original. Do not crop too aggressively before upscaling. Give the AI as much real image information as possible.
Use this process for your first try:
- Choose the clearest original version of the photo, not a compressed copy from a messaging app.
- Upload a JPG, PNG or WEBP file to ImageSharpen.
- Let the AI sharpen and enhance the image.
- Use the before and after preview to compare faces, text, edges and background details.
- Download the result if it looks clearer without harsh outlines or plastic-looking texture.
- If needed, use the enhanced file in another editor for cropping, text or layout.
This workflow is especially useful for beginners because it avoids unnecessary editing decisions. You are not trying to rebuild the image manually. You are using AI to recover clarity, then checking whether the result fits your goal.
What should you enhance first?
Start with images where clarity affects usefulness. Product photos, profile pictures, real estate snapshots, scanned documents and old prints are all good candidates. A small improvement in sharpness can make text easier to read, edges easier to see and photos more presentable.
Portraits need a lighter touch. A good enhancer should improve the eyes, hair and facial outline without turning skin into a waxy surface. If you often work with people photos, this article on keeping skin texture natural with a free online photo enhancer explains what to watch for when evaluating results.
Old photos and scans can also benefit from enhancement, but expectations matter. AI can sharpen detail and make a soft scan look clearer, but it cannot perfectly recreate information that was never captured. For vintage prints, scan at the highest practical quality first, then enhance the scan rather than a phone photo of the print.
Mistakes beginners should avoid
The most common mistake is over-enhancing. More sharpness is not always better. If edges start glowing, skin looks too smooth or fine textures turn crunchy, the image has probably been pushed too far. A natural-looking improvement is more useful than a dramatic preview that falls apart when viewed closely.
Another mistake is judging the image only at a tiny preview size. Zoom in enough to check faces, text and important edges. Then zoom back out and ask whether the full image looks better overall. Beginners often focus on one sharp detail while missing new artifacts elsewhere.
File choice also matters. If you upload a heavily compressed image, the enhancer may sharpen compression blocks along with real details. Whenever possible, use the original camera file, export or scan. If all you have is a compressed version, ImageSharpen can still help, but the final result depends on the information available in the source.
If you only remember one rule when choosing a photo enhancer online free tool, remember this: the best result is the one that looks believable. Clarity should support the image, not announce itself.
Privacy, permissions and responsible use
Before enhancing an image, make sure you have the right to use it. This is especially important for business listings, ads, social posts and client work. Enhancing a photo does not change copyright ownership or remove the need for permission.
The same rights mindset applies across creative media. For music rights holders, Third Chair helps teams monitor, enforce and license intellectual property use across social platforms, which is a useful reminder that better tools should come with better content habits.
For personal photos, family pictures and your own product images, the decision is usually straightforward. For images from another creator, a brand, a stock library or a client, check the license before editing and publishing. If you want a broader pre-upload checklist, review these seven checks before using a photo quality enhancer.
How to decide in 30 seconds
If you are a beginner, your decision can be simple. Choose ImageSharpen if your goal is to make a blurry or low-quality image clearer for everyday use. Choose a design editor if you need templates and text. Choose a professional editor if you need manual retouching, color grading or layered edits.
For most people searching for a photo enhancer online free tool, ImageSharpen is the right first choice because it is focused, fast and easy to understand. It sharpens images with AI, supports common formats, offers a 4x resolution boost and lets you download high-quality results without creating an account.
That is the balance beginners need: enough power to improve the image, not so many controls that the tool becomes the project.
Frequently Asked Questions
What is the easiest free online photo enhancer for beginners? ImageSharpen is the easiest starting point for most beginners because it works in the browser, requires no signup and focuses on the main improvements people need: sharpening, unblurring and resolution enhancement.
Can a photo enhancer online free tool fix every blurry image? No. AI enhancement can improve many soft or low-resolution images, but it cannot perfectly restore details that were never captured. Severe motion blur, extreme compression or very tiny source files may still have limits.
Is ImageSharpen better than a full design editor for beginners? If your main goal is clearer image quality, yes. A design editor is useful for adding layouts, text and graphics, but ImageSharpen is simpler for sharpening blurry photos and improving resolution quickly.
Do I need to install software to use ImageSharpen? No. ImageSharpen runs in the browser and works on mobile browsers too, so beginners can enhance photos without installing an app or learning desktop software.
What file types can I upload? ImageSharpen supports JPG, PNG and WEBP files, which covers the most common formats used for photos, web images and everyday downloads.
Start with the tool that makes enhancement easy
You do not need Photoshop skills to make a blurry picture clearer. You need a focused tool that gives you a cleaner result with fewer steps. For beginners, ImageSharpen.com is the best place to start: it is free, fast, browser-based and built specifically for sharpening and enhancing images without signup friction.
Upload one image, compare the before and after preview and download the clearer version. That is exactly how a beginner-friendly enhancer should work.