
A photo quality enhancer can make a soft image look cleaner in seconds, but it is not a magic undo button. The best results come from giving the tool a strong starting file, knowing what kind of blur you are dealing with and checking the output before you publish or print it.
Before you upload your next photo, run these seven checks. They help you avoid common problems like fake-looking detail, distorted faces, unreadable text, privacy mistakes and downloads that still look too small for their final use.
| Check | Why it matters | Quick action |
|---|---|---|
| Rights and privacy | Some images should not be edited, shared or republished | Confirm permission and remove sensitive details |
| Source file quality | Enhancers perform better with original files than screenshots | Use the highest-quality copy available |
| Blur type | Motion blur, soft focus and compression need different expectations | Zoom in and identify the main problem |
| Final size | A photo for a listing, profile or print needs enough pixels | Match enhancement to the output size |
| Faces, text and logos | These areas reveal artifacts quickly | Inspect them at 100 percent zoom |
| Lighting and color | Sharpening cannot fully fix bad exposure | Correct brightness issues before judging sharpness |
| Before and after result | Over-enhancement can look worse than mild blur | Compare both versions at actual display size |
1. Check whether you have the right to enhance and use the photo
Start with permission, especially if the photo includes people, private property, customer-submitted content or images taken from a social platform. Enhancing a photo can make it more identifiable, so the privacy question becomes more important, not less.
If you are improving your own product photo, family snapshot or personal image, the answer is usually simple. If the image came from a community conversation, social listening workflow or outreach tool, for example when you are working from your Redditor AI account, treat it as third-party material until you have clear permission to edit and republish it.
Also check whether the file contains information you did not intend to expose. House numbers, license plates, ID badges, school names, order labels and reflections in windows can become easier to read after sharpening. If the image is sensitive, blur or crop those details before public use.
For legal, medical, insurance or evidence-related images, keep the original unchanged. AI enhancement can improve visibility, but it may also reconstruct edges or textures in ways that should not be treated as verified evidence.
2. Check that you are using the best available source file
A photo quality enhancer works from the pixels you give it. If you upload a compressed screenshot of a photo, the tool has to process the screenshot artifacts along with the actual image. That can produce crunchy edges, odd textures and halos around objects.
Use the original file whenever possible. A photo exported directly from a camera, phone gallery or product shoot will usually enhance better than a version copied from a messaging app, social media post or thumbnail preview. If you have several versions, choose the one with the largest dimensions and least visible compression.
ImageSharpen supports JPG, PNG and WEBP files up to 20MB, so you can usually upload a high-quality original without installing software. If your file is larger than that, make a clean copy rather than repeatedly compressing the same image. One controlled export is better than several rounds of saving and re-saving.
A simple rule helps: enhance from the cleanest source, then resize or compress for the final platform afterward. Doing it in the opposite order limits what the enhancer can recover.
3. Check what kind of blur you are trying to fix
Not all blur behaves the same. A slightly soft portrait, a shaky action shot, a low-resolution product crop and a heavily compressed old download may all look “blurry,” but the causes are different.
Soft focus is often a good match for AI sharpening because the main shapes are still there. Mild motion blur can sometimes improve, especially if the subject is still recognizable. Severe motion blur, missed focus on a tiny subject or a photo where key details are completely smeared will have limits. A tool can infer detail, but it cannot guarantee the exact detail that was never captured.
Zoom to 100 percent before enhancing and look for the dominant issue. If edges exist but look weak, sharpening may help a lot. If the image is made of blocky squares, compression is part of the problem. If the subject is tiny because the photo was heavily cropped, upscaling may matter as much as sharpening.
For a deeper explanation of what the AI is doing under the hood, this guide to how AI image sharpening rebuilds detail in soft photos explains the difference between edge recovery, texture enhancement and upscaling.
4. Check the final use before you choose your enhancement level
A photo does not need to be enhanced the same way for every destination. A profile picture viewed on a phone can tolerate less detail than a product image that shoppers will zoom into. A family photo for a small digital album has different needs than a print meant to sit in a frame.
Think about the final size first. If the photo will appear small on a website, the goal is clean edges and natural contrast. If it will be used for ecommerce, the product needs to look clear without making fabric, food, jewelry or packaging look artificial. If it will be printed, you need enough resolution and a file that still looks natural when enlarged.
ImageSharpen includes a 4x resolution boost, which can help low-quality images become more usable for larger displays. Still, the final result depends on the starting image. A tiny crop from a distant subject can be improved, but it may not become a crisp poster-quality file.
For general editing without complex desktop software, you can also review this walkthrough on how to improve image quality online without Photoshop, which covers a broader workflow for cleaning up images in the browser.
5. Check faces, skin texture, text and logos for artifacts
The most important areas of an image are usually where enhancement mistakes become obvious. Faces can become waxy or overly sharp. Skin pores can turn into speckles. Eyes may look too contrasty. Text can gain jagged outlines, and logos can look distorted if the original file is very small.
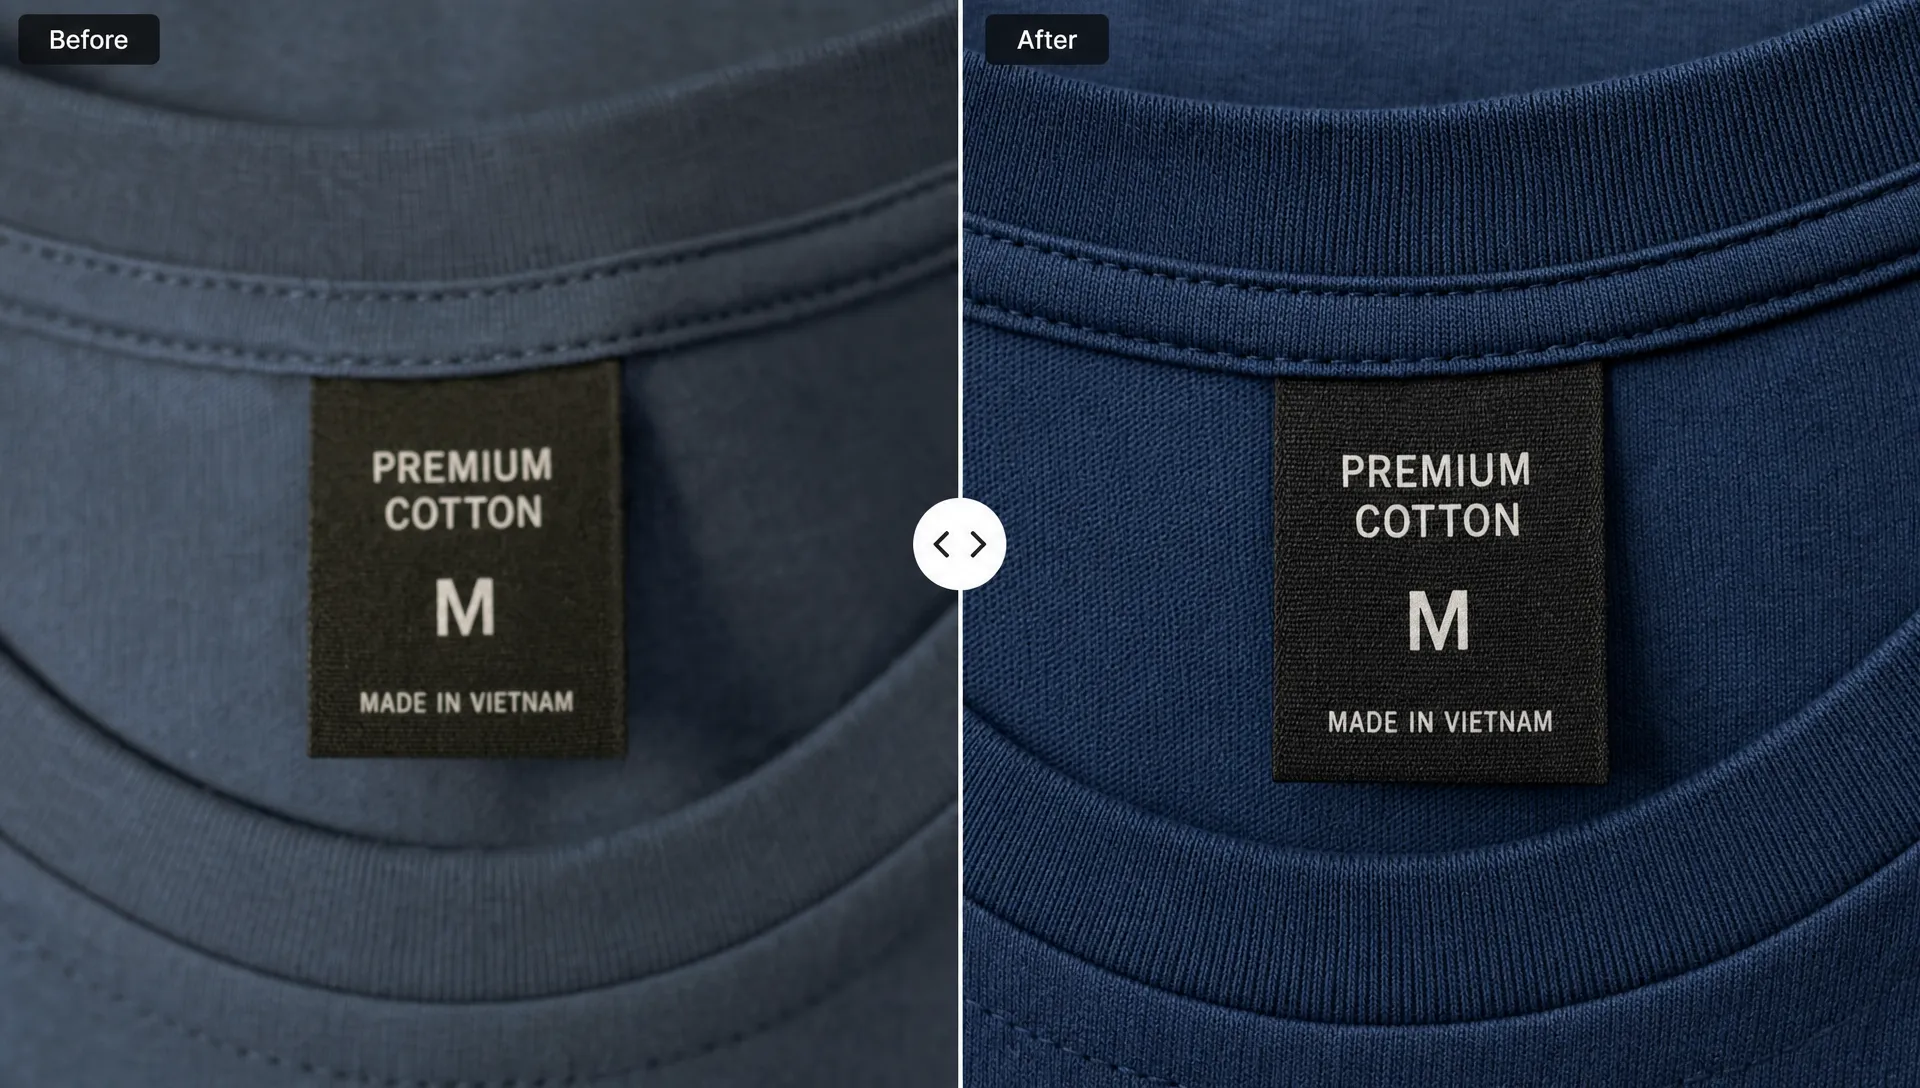
After enhancement, inspect the areas that carry meaning. In a portrait, that means eyes, hairline, skin texture and facial contours. In a product photo, check edges, labels, stitching, engraved details and packaging text. In a logo or graphic, look at curves and diagonal lines because these often reveal stair-step artifacts.
The goal is not maximum sharpness. The goal is believable clarity. A good photo quality enhancer should make the image easier to understand without making it look processed. If the result draws attention to the enhancement itself, it is probably too aggressive for public use.
Portraits deserve extra caution because many tools over-smooth faces while trying to reduce blur. If that is your use case, this article on a free online photo enhancer that keeps skin texture natural offers more specific guidance for improving portraits without creating a plastic look.
6. Check exposure, color and noise before blaming sharpness
Sometimes an image looks low quality because it is dark, flat or noisy rather than truly blurry. Sharpening can make those problems more visible. Noise in a dim photo may turn into grainy speckles. Harsh shadows can look harsher. Oversaturated colors can make edges appear unnatural.
Look at the whole image before you upload it. If the subject is underexposed, try using a brighter version of the file if one exists. If the photo was taken in poor lighting, expect the enhancer to improve clarity but not completely rebuild clean studio lighting. If the image has a color cast, sharpening may make the cast feel more noticeable because edges become clearer.
This matters most for ecommerce, real estate, food photos and portraits. A sharper photo with bad color can still feel unprofessional. A slightly softer photo with balanced light may perform better than an aggressively sharpened image with blown highlights and crunchy shadows.
When possible, solve the largest quality problem first. If blur is the main issue, use the enhancer. If the image is too dark or badly cropped, fix those basics before you judge whether the file needs more sharpness.
7. Check the before and after preview at the size people will actually see
Do not judge the result only at extreme zoom. A photo can look slightly imperfect at 200 percent and still look excellent on a product page, profile card or mobile screen. The reverse is also true: an image can look dramatic in a zoomed preview but feel over-processed at normal viewing size.
Use the before and after preview to compare the original against the enhanced version. Look for clearer edges, improved subject separation and more readable detail. Then step back and view it at the size where your audience will see it. This keeps you from chasing microscopic sharpness that does not help the final image.
If the enhanced version looks cleaner but still natural, download it. If fine textures look harsh or faces look artificial, try starting from a better source file if you have one. The fastest tool is still only as good as the decision you make before and after the upload.
ImageSharpen is designed for this quick check-and-download workflow: upload in the browser, process in about 10 seconds, compare the before and after result, then save a high-quality download. Because it works on mobile browsers too, you can run this check from a phone when you do not have access to desktop editing software.
Quick decision guide: should you enhance this photo?
| Situation | Good candidate for enhancement? | Why |
|---|---|---|
| Slightly soft portrait | Yes | Main facial details are present and can often be clarified |
| Low-resolution product image | Yes | Sharpening plus upscaling can improve listing quality |
| Screenshot of a compressed image | Maybe | Results depend on how much compression damage is visible |
| Photo with unreadable tiny text | Maybe | AI can sharpen edges, but it may not restore exact letters |
| Severely motion-blurred subject | Usually limited | The original capture may not contain enough reliable detail |
| Private image with sensitive details | Only after review | Enhancement may make personal information easier to see |
Frequently Asked Questions
What should I check first before using a photo quality enhancer? Check whether you have permission to edit and use the photo. Then make sure you are uploading the highest-quality source file available, not a screenshot or compressed copy.
Can a photo quality enhancer fix any blurry image? No. It can improve many soft, low-resolution or mildly blurred images, but it cannot guarantee perfect recovery when the original photo lacks usable detail.
Is AI sharpening safe for portraits? It can be, as long as you inspect skin, eyes and hair after enhancement. Avoid results that make faces look waxy, overly textured or unnatural.
Should I upscale or sharpen first? With an AI tool that combines sharpening and resolution improvement, you can usually upload the original and let the tool process both together. Avoid resizing the image smaller before enhancement.
What file types work with ImageSharpen? ImageSharpen supports JPG, PNG and WEBP files with uploads up to 20MB, so most common phone, web and design exports are covered.
Try a cleaner enhancement in your browser
Once these checks are done, upload your best source file to ImageSharpen. You can sharpen blurry images, unblur photos online and boost resolution without signing up or installing software. Use the before and after preview to confirm the result looks natural, then download the improved image when it is ready.