
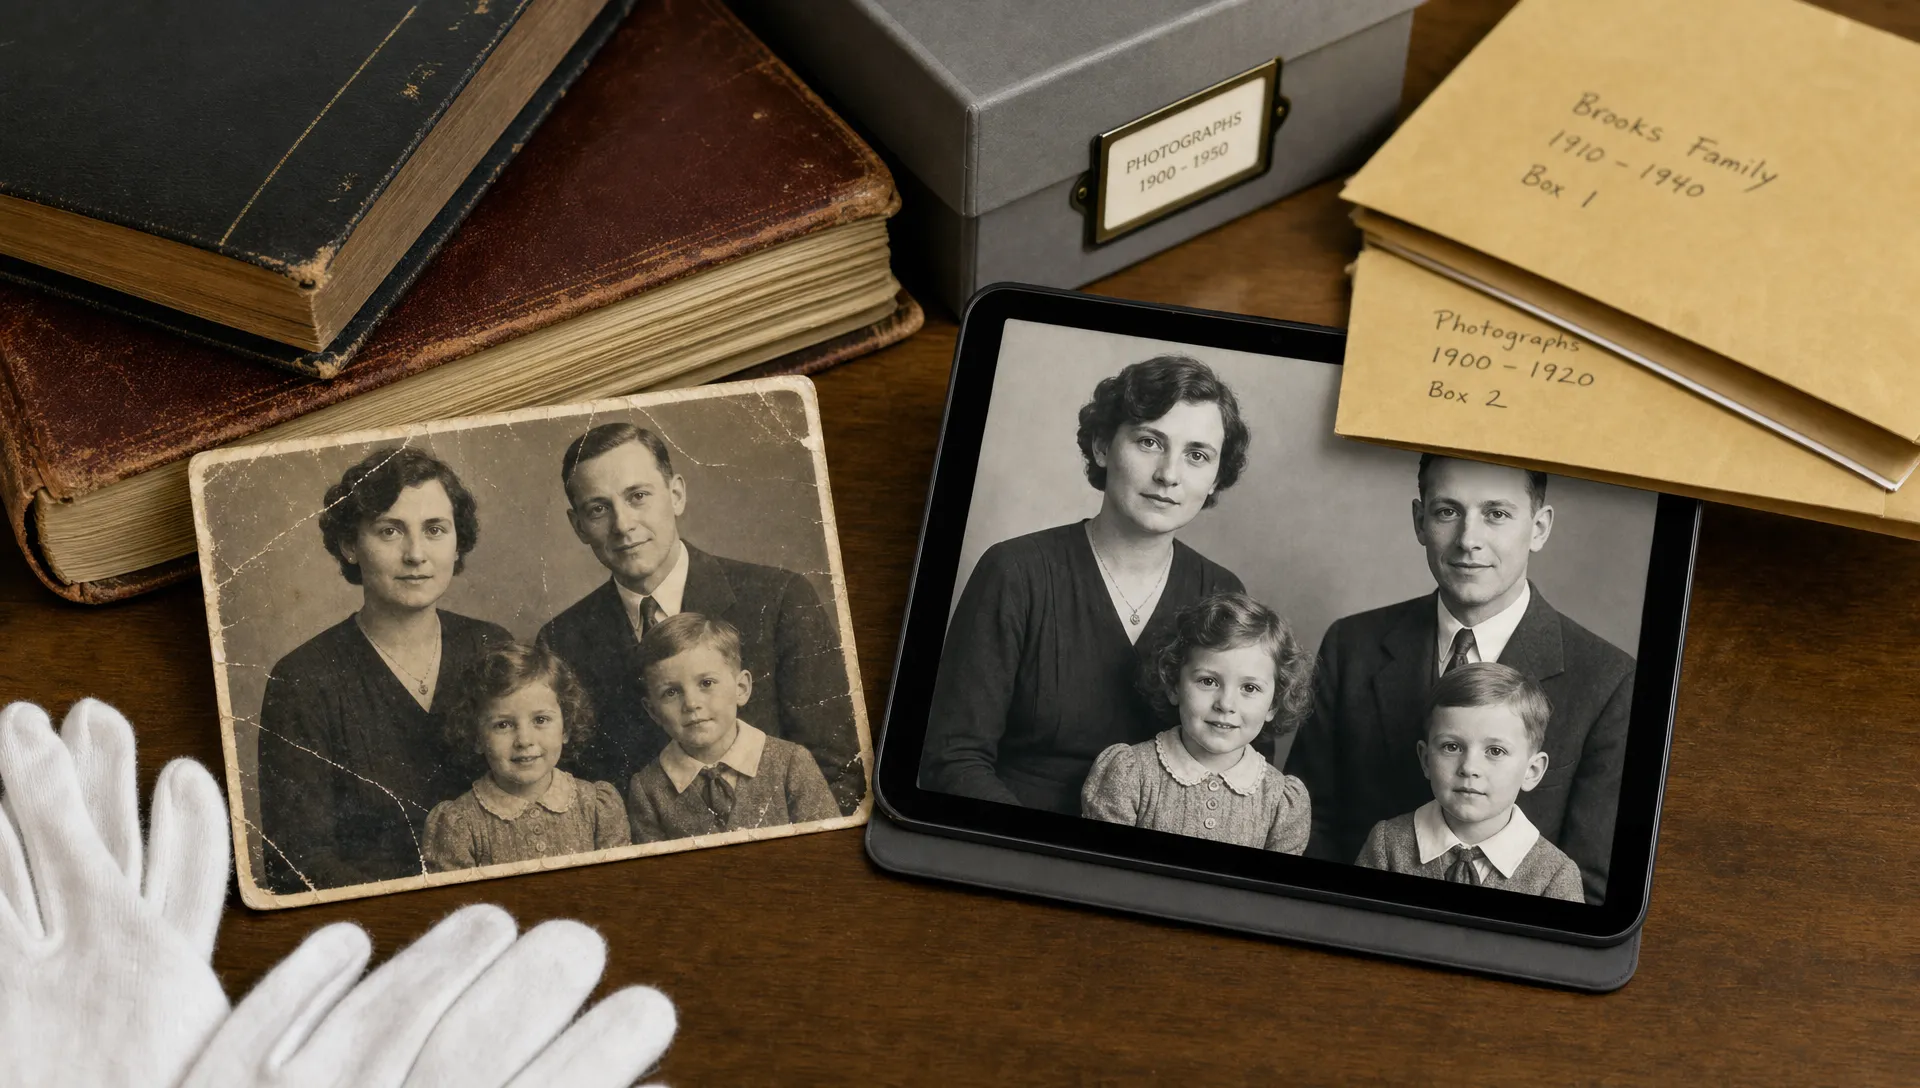
Vintage prints carry details that matter: a grandparent’s expression, the pattern on a dress, the storefront behind a family reunion. The problem is that paper photographs rarely age evenly. They fade, soften, yellow and pick up scratches. When you scan or photograph them, the digital copy can look even flatter than the original.
A photo enhancer online can help you recover clarity from those old prints without installing editing software or learning advanced restoration tools. The best results come from pairing a careful scan with realistic expectations. AI sharpening can make soft edges cleaner, boost perceived detail and prepare a photo for sharing or printing, but it cannot replace a missing corner of a torn print or invent a historically accurate background.
Used thoughtfully, an online enhancer is one of the fastest ways to bring vintage family photos back into everyday use. You can keep the original safe, work from a digital copy and create a clearer version for albums, genealogy projects, memorial slideshows or framed gifts.
What an online photo enhancer can restore in vintage prints
Old photos usually lose quality in several ways at once. The paper may have faded, the original camera may have missed focus and the scan may add its own softness. AI enhancement works best when the image still contains enough underlying detail for the software to interpret.
For vintage prints, an online enhancer is most useful for improving:
- Soft focus from old lenses or imperfect scanning
- Mild blur caused by camera movement
- Low-resolution digital copies of small prints
- Washed-out texture in clothing, hair and scenery
- Slight pixelation from compressed image files
- General lack of crispness after digitizing a print
This is different from full archival restoration. If a photo has deep cracks, missing faces, water damage or large stains, sharpening alone will not fix everything. You may still need manual retouching for physical damage. But if the main issue is that the digital copy looks dull, fuzzy or too small to print, an AI enhancer can make a visible difference in seconds.
With ImageSharpen, you can sharpen blurry images, unblur photos online and boost resolution directly in the browser. It supports JPG, PNG and WEBP files, with uploads up to 20MB, so most scanned family photos are easy to process without creating an account.
Start with the best possible digital copy
The enhancer can only work with the pixels you give it. Before uploading a vintage print, spend a few extra minutes creating a clean digital version. That step often matters more than the enhancement itself.
A flatbed scanner is usually best because it keeps the print flat and evenly lit. For small prints, scan at 600 dpi if you plan to enlarge or print the result. For basic sharing, 300 dpi is often enough. If you only have a phone, place the photo on a flat surface near a window or soft lamp, avoid direct glare and make sure the camera is exactly parallel to the print.
Do not photograph the print inside a glossy album sleeve if you can safely remove it. Reflections and plastic texture make the AI work harder. Wipe scanner glass, straighten the print and capture a little extra border so you can crop later.
Save one untouched master file before doing anything else. If your scanner exports TIFF and your online tool does not accept it, make a copy as PNG or high-quality JPG. ImageSharpen accepts JPG, PNG and WEBP, which covers the formats most people use after scanning or transferring phone images.
A strong source file should have these traits:
- The photo is in focus from edge to edge
- Faces are not covered by glare
- The print is not tilted or warped
- The file has not been repeatedly sent through messaging apps
- The full photo is captured before cropping
If you are working from a very small social media download, try to find the original scan or phone photo first. A photo enhancer can improve a compressed file, but it will do much better with the cleanest version available.
How to use a photo enhancer online for vintage prints
The basic workflow is simple, especially if you are restoring photos for family use rather than professional archiving.
- Create a backup of the original scan: Keep the unedited file in a folder labeled originals so you can return to it later.
- Upload the copy to the enhancer: Use a browser-based tool so you do not need to install software on a shared or older computer.
- Run the enhancement: Let the AI sharpen edges, improve clarity and increase resolution where appropriate.
- Check the before and after preview: Look closely at faces, text, clothing patterns and background details before downloading.
- Save the enhanced version separately: Use a clear name such as family-reunion-1952-enhanced so you do not overwrite your master file.
If you want a broader walkthrough of browser-based enhancement, this guide on how to improve image quality online without Photoshop covers the same no-software approach for everyday photos.
For vintage prints, resist the urge to enhance the same file repeatedly. One good pass is usually better than several aggressive passes. Too much sharpening can create halos around faces, make wrinkles look harsh or turn film grain into distracting speckles.
What AI sharpening can and cannot fix
A realistic restoration plan saves time. Use the online enhancer for clarity problems, then use other tools or manual editing only if the photo needs deeper repair.
| Vintage print issue | Can a photo enhancer help? | Best next step |
|---|---|---|
| Mild blur | Yes, especially around edges and facial features | Upload a clean scan and compare the preview carefully |
| Low-resolution scan | Yes, resolution boost can help with sharing and prints | Use the highest-quality source file available |
| Faded contrast | Sometimes, if detail is still present | Adjust brightness or contrast after sharpening if needed |
| Dust spots | Limited help | Remove dust manually in an editor before or after enhancement |
| Torn or missing areas | No, not through sharpening alone | Use dedicated restoration or manual retouching |
| Heavy glare | Limited help | Re-scan or re-photograph the print with better lighting |
| Severe motion blur | Sometimes, but results vary | Try the enhancer, then decide if the image is usable |
Think of online enhancement as the clarity stage of restoration. It is excellent for making a scan look less flat and more usable. It is not a substitute for physical conservation, colorization or complex reconstruction.
Keep portraits natural, not overprocessed
Most vintage prints are portraits: wedding photos, school pictures, military portraits, holiday gatherings and studio family shots. Faces are where enhancement quality matters most.
A good result should make the eyes, hairline and clothing texture clearer without making the person look waxy or modernized. Many AI tools are designed for contemporary digital photos, so they may over-smooth skin if pushed too far. With old portraits, texture is part of the image. Film grain, paper texture and fine wrinkles help the photo feel authentic.
If your vintage print is a close-up portrait, review the face at normal viewing size and at a closer zoom. Look for unnatural eyelashes, overly sharp teeth, plastic-looking skin or halos around the head. If you see these effects, go back to the original scan and try a cleaner source file rather than stacking more edits.
For more detail on preserving facial realism, see this guide to using a free online photo enhancer that keeps skin texture natural. The same principle applies to old prints: clarity should support the memory, not replace the person’s real features.
Prepare restored vintage photos for printing
Many people enhance old photos because they want to print them for a frame, family book or memorial table. Printing exposes weaknesses that may not be obvious on a phone screen, so resolution matters.
A simple way to estimate print size is to divide the image dimensions by the print resolution. At 300 pixels per inch, a 3000 by 2400 pixel image prints cleanly at about 10 by 8 inches. At 200 pixels per inch, the same file can be printed larger, but it may look softer up close.
AI upscaling can help when the scan is small. ImageSharpen offers a 4x resolution boost, which can make older digital copies more practical for prints or larger displays. If your main goal is enlargement, the guide to using a free AI image upscaler without sign-up explains how browser-based upscaling fits into the process.
After enhancing, do a small test print before ordering a large version. Screens add light and can hide artifacts. Paper reveals sharpening halos, grain and noise more clearly. A small print lets you catch problems before spending money on a framed enlargement.
Choose matte or satin paper for many vintage images. Glossy paper can exaggerate imperfections, especially if the original print already has scratches or uneven texture. If the photo is very old or historically valuable, keep the original stored safely and print only from the digital copy.
Preserve authenticity when using AI on family archives
Restoring an old photo is not only a technical task. It is also a record-keeping decision. A clearer version can help relatives recognize people, read signs or appreciate a moment that was almost lost, but the edited file should not erase the fact that it is edited.
As AI tools become more common, the wider debate around AI detection is a useful reminder that people care about what is original, what is enhanced and what has been generated. For family archives, the safest approach is transparency. Keep the original scan, label the enhanced copy and avoid adding invented details unless everyone understands that the image has been creatively reconstructed.
For genealogy projects, school archives or local history pages, include a short note such as Enhanced from original family print or Digitally sharpened from scanned photograph. That small label protects trust and helps future viewers understand what they are seeing.
A practical naming system also helps. Use filenames like smith-wedding-1948-original-scan and smith-wedding-1948-enhanced. If you make a cropped version for social media, save that as a separate file too. Clear labeling prevents confusion years later.
Common mistakes to avoid
Restoring vintage prints online is easy, but a few habits can limit the final quality.
Do not use a screenshot of a photo when the scan or camera file is available. Screenshots are usually lower quality and may include compression, scaling or color shifts. Do not crop faces tightly before enhancement unless you have a specific reason. The AI often performs better when it can see surrounding detail.
Avoid sending the same image through multiple apps that all sharpen, smooth or upscale. Each pass changes the pixels. After a few rounds, the photo may look detailed at first glance but strange when viewed closely.
Be careful with very old portraits that have soft focus by nature. Some blur is part of the original camera and lens character. Enhancing it too aggressively can make the photo feel less historical. Aim for a clean, respectful version rather than a modern-looking remake.
Finally, organize files as you go. A folder with originals, enhanced copies and print-ready versions will save you from guessing which file is which later.
Frequently Asked Questions
Can a photo enhancer online fix very old blurry prints? It can improve many blurry vintage prints, especially if the blur is mild or caused by a soft scan. Severe motion blur, missing detail or major physical damage may need manual restoration.
Should I scan a vintage photo before using an enhancer? Yes, scanning is usually the best starting point. A flatbed scan at 300 or 600 dpi gives the enhancer more detail than a quick phone snapshot, though a careful phone photo can still work.
Will AI enhancement change the faces in old family photos? A good enhancement should sharpen existing details, not redesign faces. Always check the before and after preview closely and keep the original scan so you can compare results.
What file format should I use for restoring old prints online? JPG, PNG and WEBP are common web-friendly formats. For best quality, start with a high-quality scan and avoid repeatedly compressing the image before uploading.
Can I print an enhanced vintage photo? Yes, if the file has enough resolution for the print size you want. AI upscaling can help, but you should still order a small test print before making a large framed version.
Restore your vintage prints in the browser
Old photos do not need to stay blurry in a shoebox or hidden in a low-quality scan. With a careful digital copy and a reliable online enhancer, you can recover clarity, prepare images for printing and share family memories in a cleaner form.
Try ImageSharpen to sharpen vintage prints online, boost resolution up to 4x and download enhanced photos without signing up or installing software.