
If you need to enhance blurry photo quality for a real estate listing, the goal is not to make a home look different. It is to make the image match what buyers would see in person: sharp room edges, readable finishes, clean window lines and enough detail to understand the space. Soft images can make a cared-for property look dated, small or neglected, especially on mobile feeds where buyers compare homes in seconds.
Real estate photography does not need to look cinematic to perform well. It needs to be accurate, bright and easy to read. A thoughtful sharpening workflow can help you rescue slightly soft listing photos, reduce the need for a reshoot and publish images that support buyer confidence without crossing into misleading editing.
Why clearer photos matter in real estate listings
Property photos carry a lot of weight before a buyer ever reads the full description. A crisp exterior shot can make curb appeal obvious, while a clear kitchen photo helps people evaluate cabinetry, countertops, appliance placement and traffic flow. When those details are fuzzy, buyers may assume the home is lower quality than it is.
The goal when you enhance blurry photo files is to restore lost information as faithfully as possible, not to hide defects. This distinction matters. Real estate buyers expect photos to represent the property honestly, and agents need to follow MLS, portal and brokerage rules about image manipulation.
Clear visuals also reduce friction. If buyers can understand the floor plan, finishes and condition from the gallery, they are more likely to save the listing, request more information or book a showing. The same trust pattern appears in other high-consideration searches, from property listings to comparison guides such as the best places to buy an engagement ring in New Zealand, where people rely on clear visual signals before making a major decision.
Common blur problems that hurt listing photos
Not all blurry real estate photos have the same cause. Some files are soft because the camera moved. Others lose sharpness after heavy cropping, low light, compression or resizing for a portal. Knowing the cause helps you decide whether AI sharpening is enough or whether a reshoot is the better choice.
A practical enhance blurry photo workflow starts with diagnosing the problem before applying any edit. If the file contains enough detail, AI sharpening and upscaling can often improve it. If the room is out of focus, badly exposed or blocked by motion blur, sharpening can help only so much.
| Blur issue | What it looks like | Best response |
|---|---|---|
| Slight camera shake | Edges look soft across the whole frame | Sharpen and preview at listing size |
| Low-light noise | Grainy shadows and muddy corners | Reduce noise, brighten carefully and sharpen lightly |
| Heavy crop | Details look pixelated after zooming in | Use resolution boost before final export |
| Compression | Fine textures look smeared | Start from the highest-quality original |
| True missed focus | One area is sharp but the room is not | Reshoot if key details are unclear |
How to enhance blurry photo quality without misleading buyers
A good real estate edit should make the image easier to interpret, not more flattering than reality. That means straightening verticals, correcting mild blur and improving clarity while leaving permanent features alone. Do not remove cracks, stains, neighboring buildings, power lines, wear, fixtures or anything that affects a buyer's understanding of the property.
Use this simple workflow before publishing:
- Start with the original file, not a screenshot from a messaging app or portal.
- Crop only after sharpening if you need to preserve as much detail as possible.
- Keep color and exposure natural so walls, floors and finishes stay accurate.
- Check windows, tile lines, cabinet edges and text on appliances for sharpening artifacts.
- Compare the edited file with the original before downloading.
- View the final image on a phone because many buyers browse listings on mobile.
This approach is especially useful for agents, property managers and owners who already have usable photos but notice softness after uploading to a listing platform. It can also help when a room was photographed in decent light, but the exported file looks less crisp than expected.
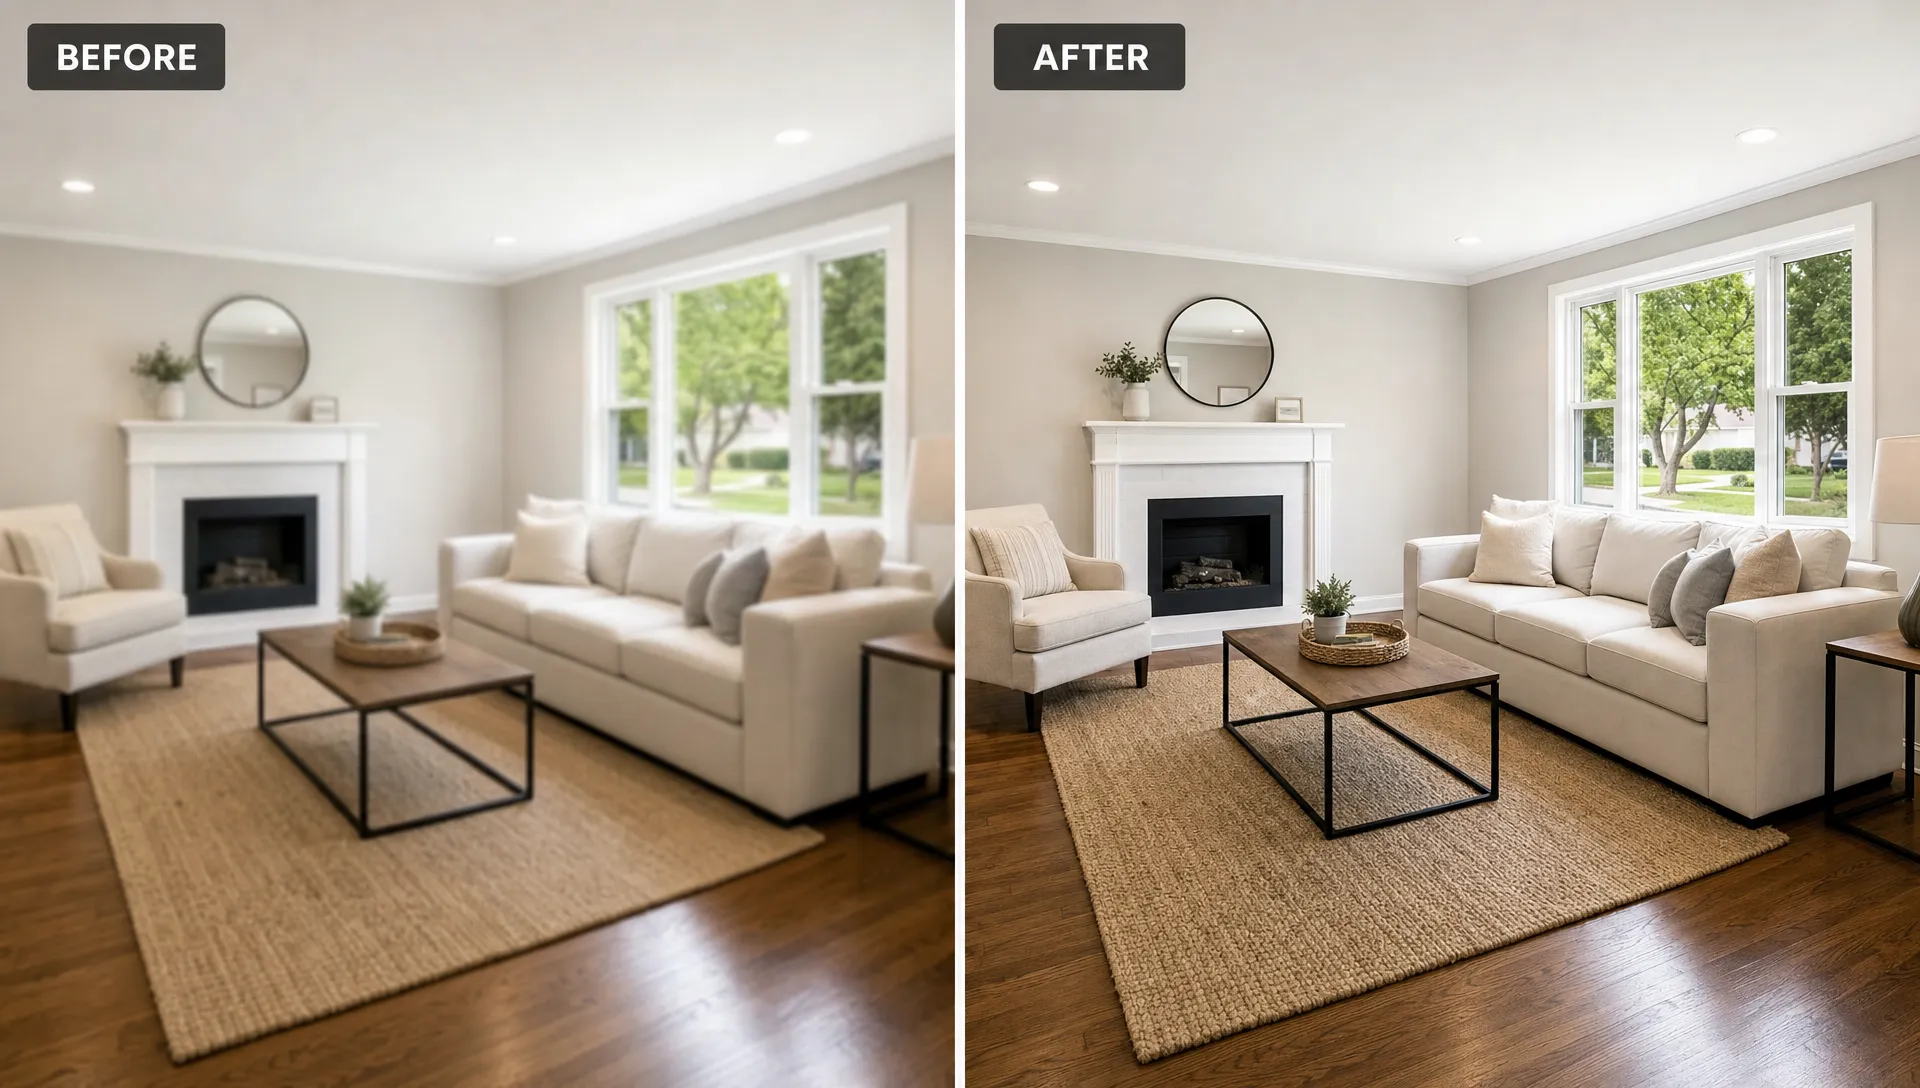
Room-by-room priorities for sharper listing galleries
If you enhance blurry photo sets room by room, prioritize the frames that influence a showing request. The hero exterior, main living area, kitchen, primary bedroom and bathrooms usually deserve the most attention because buyers use them to judge condition and livability quickly.
For exterior shots, sharpening should emphasize rooflines, siding, landscaping, pathways and entry details. Keep the sky natural and avoid making grass or trees look unnaturally crisp. For kitchens, focus on cabinet lines, counters, backsplash texture and appliance edges. These surfaces can reveal artifacts quickly, so use a lighter touch if patterns start to shimmer.
Living rooms and bedrooms benefit from clear furniture outlines, flooring detail and window trim. Bathrooms need special care because tile, mirrors and chrome fixtures can become harsh if oversharpened. If a bathroom photo is both dark and blurry, brighten the room first, then apply modest sharpening.
Amenity images also matter. Pools, garages, home offices, decks and views can set a listing apart, but they must stay believable. A sharper view photo should still reflect the actual visibility from the property, not create artificial scenery.
When AI enhancement is enough and when to reshoot
AI sharpening is best for images that are close to usable. If a listing photo is slightly soft, compressed or low resolution, a browser-based enhancer can make edges clearer and improve the final export. ImageSharpen supports JPG, PNG and WEBP uploads, offers a 4x resolution boost and lets you preview before and after results directly in the browser.
Use AI to enhance blurry photo clarity when the composition is good, the room is visible and the blur does not hide material information. The tool can help restore definition in floors, walls, cabinetry and exterior edges in seconds without requiring software installation or a sign-up.
A reshoot is better when the camera focused on the wrong object, a person or pet is visible, the room is too dark to evaluate or the image hides something important. AI cannot turn a fundamentally poor frame into honest professional photography. If you want to understand the technology behind the process, this overview of how AI photo enhancement improves blurry images fast explains edge sharpening, noise reduction and upscaling in more detail.
A fast browser workflow with ImageSharpen
You can improve a soft real estate image without opening a full editing suite. Upload the best source file to ImageSharpen, preview the improvement and download the enhanced version if it looks accurate. Processing is fast, and the tool is designed for no-sign-up use directly in the browser, including mobile browsers.
For real estate listing work, review the result at two sizes. First, inspect the image at a larger size to catch halos, crunchy textures or strange edges around windows and railings. Then view it at the approximate size buyers will see on the portal. An edit that looks slightly strong at full size may look clean in a listing thumbnail, but anything that changes the perceived condition of the home should be rejected.
If your photo is more generally blurry and not specific to property marketing, the broader guide on how to make a blurry photo clear for free walks through common causes and basic repair steps.
Pre-publishing checklist for real estate photo clarity
Before you enhance blurry photo files for publication, decide what success looks like. The finished image should help buyers understand the property faster. It should not look like a filtered advertisement or a virtual renovation.
| Check before upload | What to confirm |
|---|---|
| Accuracy | Permanent features, defects and surroundings remain visible |
| Natural texture | Walls, floors, grass and tile do not look crunchy |
| Straight lines | Doors, windows and cabinets are clear without looking warped |
| Mobile readability | The room still looks clear on a phone screen |
| File quality | The final image is not repeatedly compressed |
| Gallery consistency | Brightness and sharpness feel similar across the listing |
A consistent gallery usually performs better than one or two dramatically edited images surrounded by dull or blurry ones. If only the first photo is sharp, buyers may wonder why the rest of the home looks different. Apply a light, repeatable edit across the set and reserve stronger enhancement for files that genuinely need it.
Frequently Asked Questions
Can I enhance blurry photo files taken on a phone? Yes, as long as the original file has enough detail. Phone photos often respond well to sharpening if the room is visible, the lens was clean and the file was not heavily compressed before upload.
Is it acceptable to sharpen real estate listing photos? Sharpening is generally acceptable when it improves clarity without changing the property. Avoid edits that remove damage, alter views, change colors unrealistically or hide anything a buyer should know.
Will AI sharpening replace a professional real estate photographer? No. AI enhancement can improve usable images, but strong lighting, proper composition and accurate exposure still matter. For premium listings or difficult spaces, professional photography is often worth it.
What file should I upload for the best result? Use the highest-quality original available. Avoid screenshots, social media downloads and files that have already been resized several times because they contain less detail for the enhancer to recover.
Make your next listing gallery look clearer
Blurry real estate photos can cost attention before buyers even open the listing. If your images are mostly usable but look soft, try sharpening them before you schedule a reshoot. With ImageSharpen, you can upload a photo, preview the improvement and download a clearer version in your browser for free.