
Learning how to sharpen photo details is mostly about restraint. A clear image should look like a better version of the original, not like it was run through a heavy filter. The trick is to recover edges, texture and contrast while leaving natural grain, skin, shadows and backgrounds believable.
Overediting usually happens when you push every correction at once: sharpening, denoising, contrast, saturation and resolution. That can create halos around objects, waxy faces, crunchy hair, noisy skies and text that looks outlined instead of clean. This guide gives you a practical workflow for getting crisp results with AI sharpening while keeping the final photo natural.
What it means to sharpen photo details naturally
Natural sharpening improves perceived focus without changing the character of the image. It makes eyelashes, product edges, fabric texture, architecture lines or document text easier to read, but it does not make every pixel equally intense.
The eye expects variation. A portrait can have crisp eyes and soft background blur. A product photo can have clear packaging and gentle shadows. An old family photo can look cleaner while still keeping some film grain. When sharpening removes all softness, the photo often starts to feel artificial.
A natural result usually has three qualities: edges look clearer, flat areas stay calm and texture still matches the subject. Skin should not become plastic. Grass should not look like wire. Clouds should not become gritty. The safest way to sharpen photo quality is to enhance real detail only until the image feels in focus again.
Why photos start looking overedited
Most overedited photos suffer from the same problem: the edit tries to fix blur by adding too much contrast around edges. That extra contrast can make a picture look sharper at a glance, but it also introduces visual artifacts that were not in the original file.
| Overedited sign | What it looks like | How to pull it back |
|---|---|---|
| Halos | Bright or dark outlines around people, buildings or objects | Use a lighter enhancement and check edges at full size |
| Crunchy texture | Hair, grass, fabric or gravel looks harsh | Preserve some natural softness in detailed areas |
| Waxy surfaces | Skin, food or polished products lose realistic texture | Avoid combining heavy sharpening with heavy smoothing |
| Noisy flat areas | Skies, walls or shadows show speckles | Start with a cleaner file and avoid repeated exports |
If you sharpen photo edges until every boundary glows, the image may look worse even though it appears more defined. The best correction is usually a smaller one applied to a better source file.
Start with the cleanest version you have
Sharpening cannot fully recover information that was never captured, so the source file matters. If you have several versions of the same image, choose the original camera file, the largest download or the least compressed copy.
Avoid screenshots when you can. They often reduce resolution and add compression artifacts, especially around text and high-contrast edges. If the photo came from a messaging app, check whether you can download the original file instead of the compressed preview.
For scans, receipts or old prints, capture the image again if the first version has glare, motion blur or a tilted angle. A clean starting point gives the AI more real detail to work with and reduces the temptation to overcorrect.
Use an AI sharpener in one controlled pass
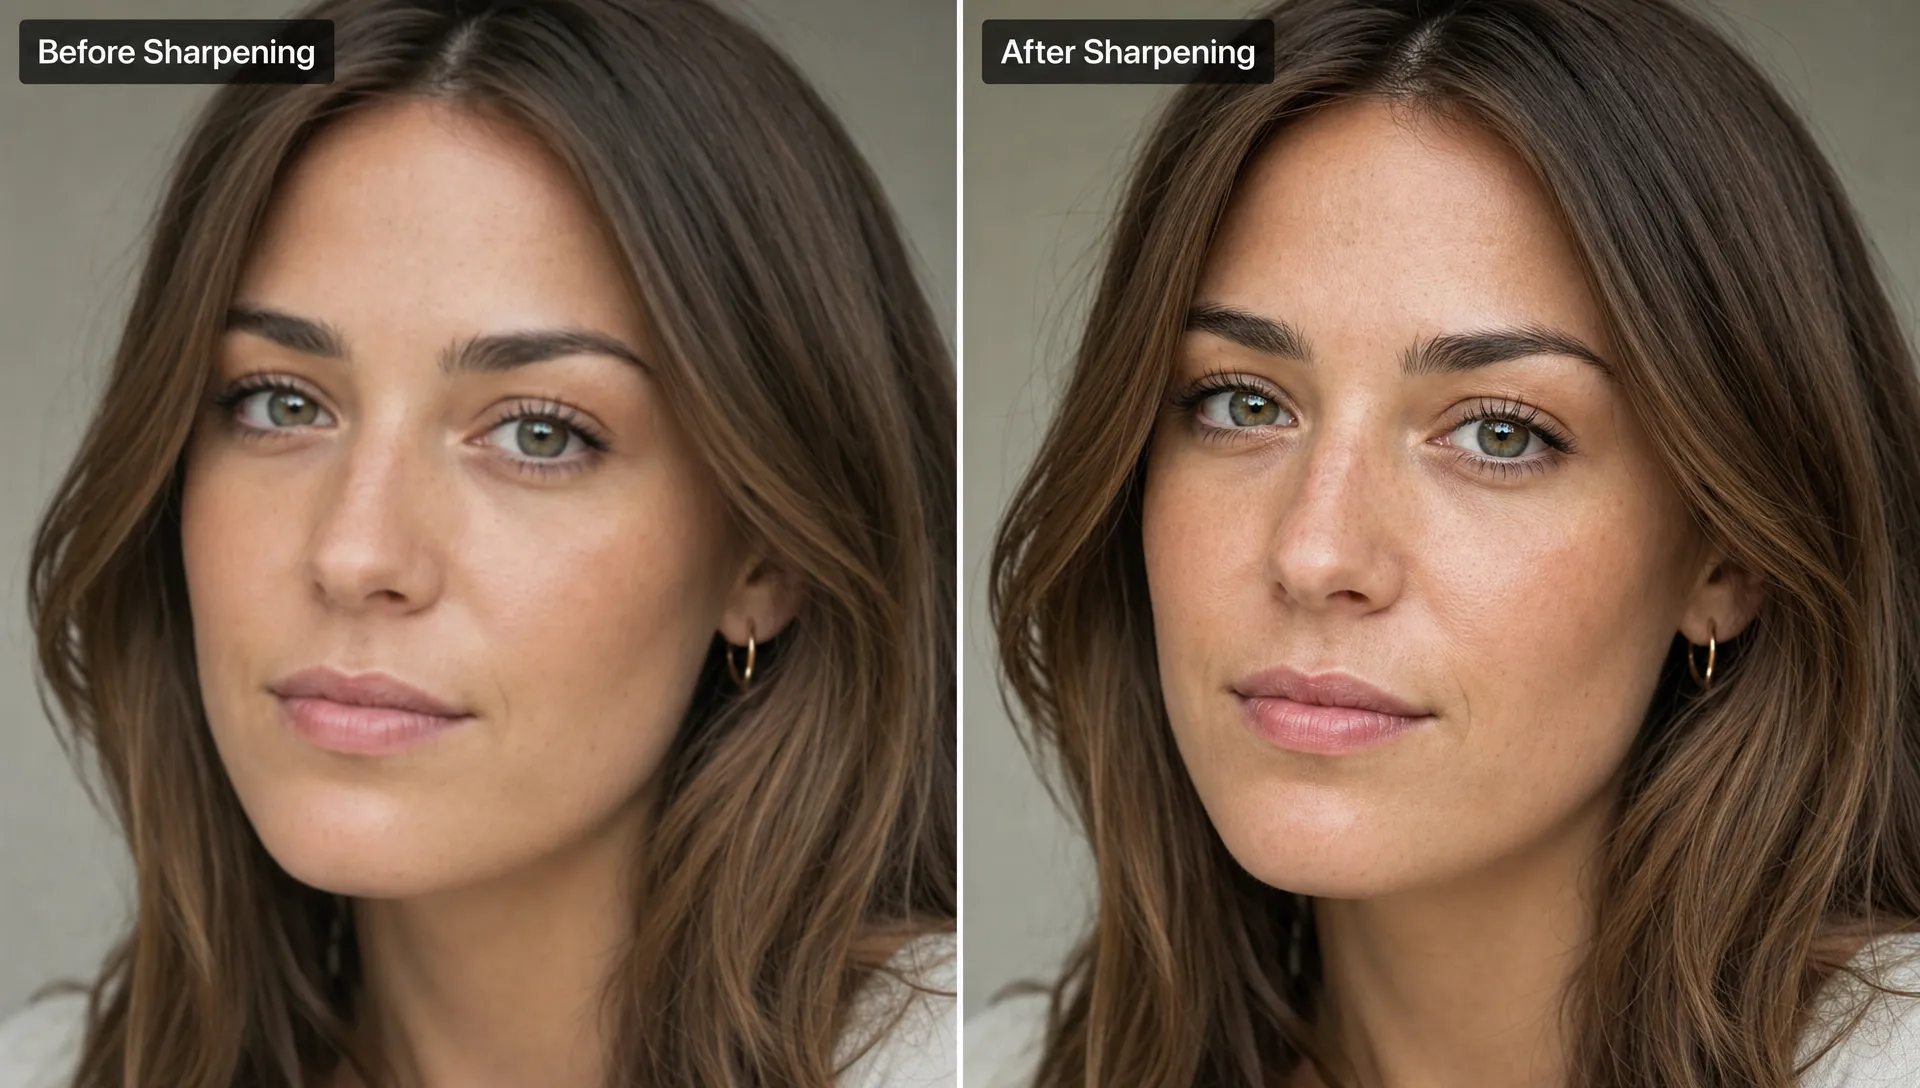
A good workflow is simple: upload, enhance, compare and download only when the result still looks natural. Tools such as ImageSharpen are useful because they process the file directly in the browser, support JPG, PNG and WEBP uploads up to 20MB and provide a before and after preview.
When you sharpen photo clarity with AI, resist the urge to run the same file through multiple enhancers. Repeated sharpening can stack artifacts, especially around hair, logos, small text and patterned fabrics. One clean pass is usually better than several aggressive ones.
If the image needs a resolution boost, apply it as part of a controlled enhancement rather than enlarging the photo in one tool and sharpening it in another. ImageSharpen can boost resolution up to 4x, which helps when a small image needs to look cleaner for sharing, presentation or download.
Adjust your expectations by photo type
Different images tolerate sharpening differently. A landscape can often handle more crispness than a close-up portrait. A product image may need clean edges, but the shadows should still look smooth. A document may need legibility more than beauty.
For portraits, sharpen photo details around the eyes, hairline and clothing, then check that pores and skin texture still look human. If you often edit faces, this guide to a free online photo enhancer that keeps skin texture natural goes deeper into avoiding the plastic look.
For documents, screenshots and labels, the priority is clean edges. Small letters can quickly turn jagged if the enhancement is too strong, so inspect the smallest readable text before saving. For more focused advice, see how to sharpen images online while preserving fine text and edges.
| Photo type | Main risk | Natural sharpening goal |
|---|---|---|
| Portrait | Waxy skin or harsh pores | Clear eyes and hair with believable skin |
| Product photo | Edge halos or noisy shadows | Crisp packaging with smooth surfaces |
| Landscape | Crunchy foliage or gritty sky | Defined foreground with calm sky tones |
| Document or scan | Jagged letters | Readable text with clean contrast |
| Old photo | Lost grain or fake texture | Better clarity while preserving age and character |
Check the result at the right zoom level
A photo can look great when zoomed out and overprocessed at full size. It can also look too soft at 200 percent even though it is perfectly fine for Instagram, a website thumbnail or a presentation slide. Judge the result based on the final use.
Check the image at 100 percent first. Look at edges, faces, text and flat areas. Then zoom out to the size where people will actually view it. If the photo is meant for a product listing, inspect the main product and the background separately. If it is for a profile picture, focus on the face and hair, not tiny background details.
Before you sharpen photo files for a client, listing or portfolio, compare the original and enhanced versions side by side. The improved version should feel clearer in the important areas without drawing attention to the edit itself.
Avoid stacking too many enhancements
The fastest way to make an image look overedited is to combine every possible correction without a plan. Sharpening, denoising, saturation, contrast, clarity and upscaling all affect detail. Used together at high intensity, they can make a file look synthetic.
Use this order instead: fix the biggest problem first, check the result and stop if the image already works. If blur is the main issue, sharpen first. If the file is tiny, use a resolution boost. If the image is dark, make exposure adjustments gently after improving clarity.
For teams that process large photo libraries, product catalogs or internal visual workflows, a custom AI system can be useful beyond one-off enhancement. Agencies such as Just Use AI show how tailored AI tools and agents can be built around specific business processes, while a free browser sharpener is usually the simpler choice for individual photos.
Common mistakes that make sharpening look fake
One common mistake is judging sharpness only by the subject outline. A clean outline is good, but the surrounding texture matters too. If the subject has a white glow, dark rim or jagged edge, the sharpening has gone too far.
Another mistake is trying to make a blurry photo look like a studio shot. Some softness may be part of the image, especially with motion, older cameras or low light. The goal is improvement, not reinvention.
A final mistake is saving and re-uploading the same image repeatedly. Each export can add compression, especially with JPG files. Keep the best original, create one enhanced version and download the final file at the highest quality available.
Frequently Asked Questions
Can I sharpen photo details without Photoshop? Yes. A browser-based AI sharpener can improve clarity without installing editing software. Upload the image, preview the result and download the enhanced version if it still looks natural.
Why does my photo look crunchy after sharpening? Crunchiness usually comes from too much edge contrast, repeated sharpening or enhancing a heavily compressed file. Start from the cleanest version you have and avoid running the image through multiple tools.
Should portraits be sharpened less than landscapes? Usually, yes. Portraits need careful handling because skin texture can quickly look harsh or plastic. Landscapes, architecture and documents can often accept more edge definition.
What is the best way to tell if a photo is overedited? Compare it with the original at 100 percent zoom. Look for halos, jagged edges, noisy flat areas, waxy skin and textures that no longer match the subject.
Try a cleaner way to enhance blurry photos
If you need a sharper image but do not want it to look filtered or artificial, use a workflow built around comparison and restraint. Upload your image to ImageSharpen, preview the before and after result and download the clearer version when the photo still looks like itself.
You do not need to sign up or install software. The tool works in the browser, supports common image formats and helps you improve clarity quickly while keeping the final result believable.