
Enhancing an image for free is no longer hard. The harder part is making the photo look clearer without turning skin into plastic, trees into crunchy noise or product edges into glowing outlines. Natural detail comes from restraint: improving the useful parts of an image while keeping the character of the original file intact.
A good enhancement workflow does not chase maximum sharpness. It improves the image enough for its real use, whether that means a cleaner profile photo, a sharper product image, a clearer document scan or a better social post. With the right order of steps and a reliable free AI image enhancer, you can get a sharper result without the over-processed look.
What natural detail means in image enhancement
Natural detail is the texture, edge definition and tonal variation that make a photo look believable. In a portrait, that might mean eyelashes, hair strands and real skin texture. In a product photo, it might be fabric grain, label text or clean edges. In a landscape, it means leaves, rocks and clouds look defined without becoming noisy.
The goal is not to create artificial detail everywhere. When an enhancer adds too much local contrast, the photo may look sharp at first glance but harsh when viewed closely. Faces can look waxy, shadows can turn gritty and edges can develop halos. A natural result keeps the subject clearer while leaving smooth areas smooth.
This is especially important when using AI. AI image enhancement can estimate missing clarity, sharpen edges and upscale resolution, but the best result still depends on the input file and your judgment during preview. Think of AI as a clarity assistant, not a license to push every detail to the limit.
Why enhanced images sometimes look fake
Most unnatural edits come from one of three problems: too much sharpening, too much smoothing or repeated compression. Traditional sharpening boosts contrast along edges. That can make details pop, but it can also create bright or dark outlines. Heavy smoothing removes noise, but it can also erase pores, fabric texture and fine hair.
Compression makes the problem worse. A heavily compressed image already has blocky artifacts, smeared detail and color banding. If you enhance that file aggressively, the tool may sharpen the artifacts as if they were real detail. This is why a screenshot from a messaging app often enhances worse than the original photo from the camera roll.
Common signs of over-enhancement include:
- Skin that looks too smooth or rubbery
- Bright outlines around buildings, faces or text
- Grass, hair or fabric that looks crunchy
- Shadow areas filled with colored speckles
- Logos or small text that become distorted
If you see these problems, the answer is usually not to enhance more. It is to go back to the cleanest source file, avoid stacking multiple filters and judge the result at the size where the image will actually be used.
The best free workflow for natural-looking enhancement
The order of your edits matters. If you crop, compress, filter and then sharpen, you give the enhancer less information to work with. A cleaner workflow gives AI more real detail and reduces the chance of fake-looking output.
- Start with the best original file: Use the camera original when possible. Avoid downloaded social media copies, screenshots of photos or files that have been resized many times.
- Enhance before heavy cropping: Cropping first removes pixels that could help the AI understand the subject. If you need a tight crop, enhance first, then crop the finished image.
- Fix clarity before color styling: Sharpening and upscaling should usually happen before strong color filters, contrast presets or creative effects. Heavy styling can confuse texture and edge recovery.
- Use before and after preview carefully: Compare the enhanced result against the original at normal viewing size and closer inspection. A photo should look better in context, not just sharper at 100% zoom.
- Check the most sensitive areas: For portraits, inspect eyes, skin, lips and hair. For products, check labels, edges and material texture. For documents, check small text and straight lines.
- Download once in high quality: After enhancement, avoid repeatedly saving and re-uploading the same image. Each lossy save can add compression artifacts.
This simple order helps preserve the original image structure. It also makes it easier to spot when enhancement has improved clarity enough and when pushing further would make the result less natural.
How to enhance images free with ImageSharpen
ImageSharpen is designed for quick browser-based enhancement, so you do not need to install software or create an account. You can upload a JPG, PNG or WEBP image up to 20MB, sharpen blurry areas, boost resolution up to 4x, preview the before and after result, then download the enhanced image.
The process is straightforward:
- Upload your image: Use the clearest version you have, preferably the original file rather than a screenshot.
- Let the AI process the photo: ImageSharpen applies AI sharpening and enhancement in the browser workflow, with fast processing for common image files.
- Compare the preview: Look for improved clarity in the subject, but also check skin, edges, shadows and text for unnatural artifacts.
- Download the enhanced result: Save the version that looks clean at the size you plan to use it.
For portraits, the preview step matters more than the sharpness level you think you want. A face can be technically sharper and still look worse if natural skin texture disappears. If your main goal is portrait clarity, the guide on using a free online photo enhancer that keeps skin texture natural goes deeper into avoiding over-smoothed faces.
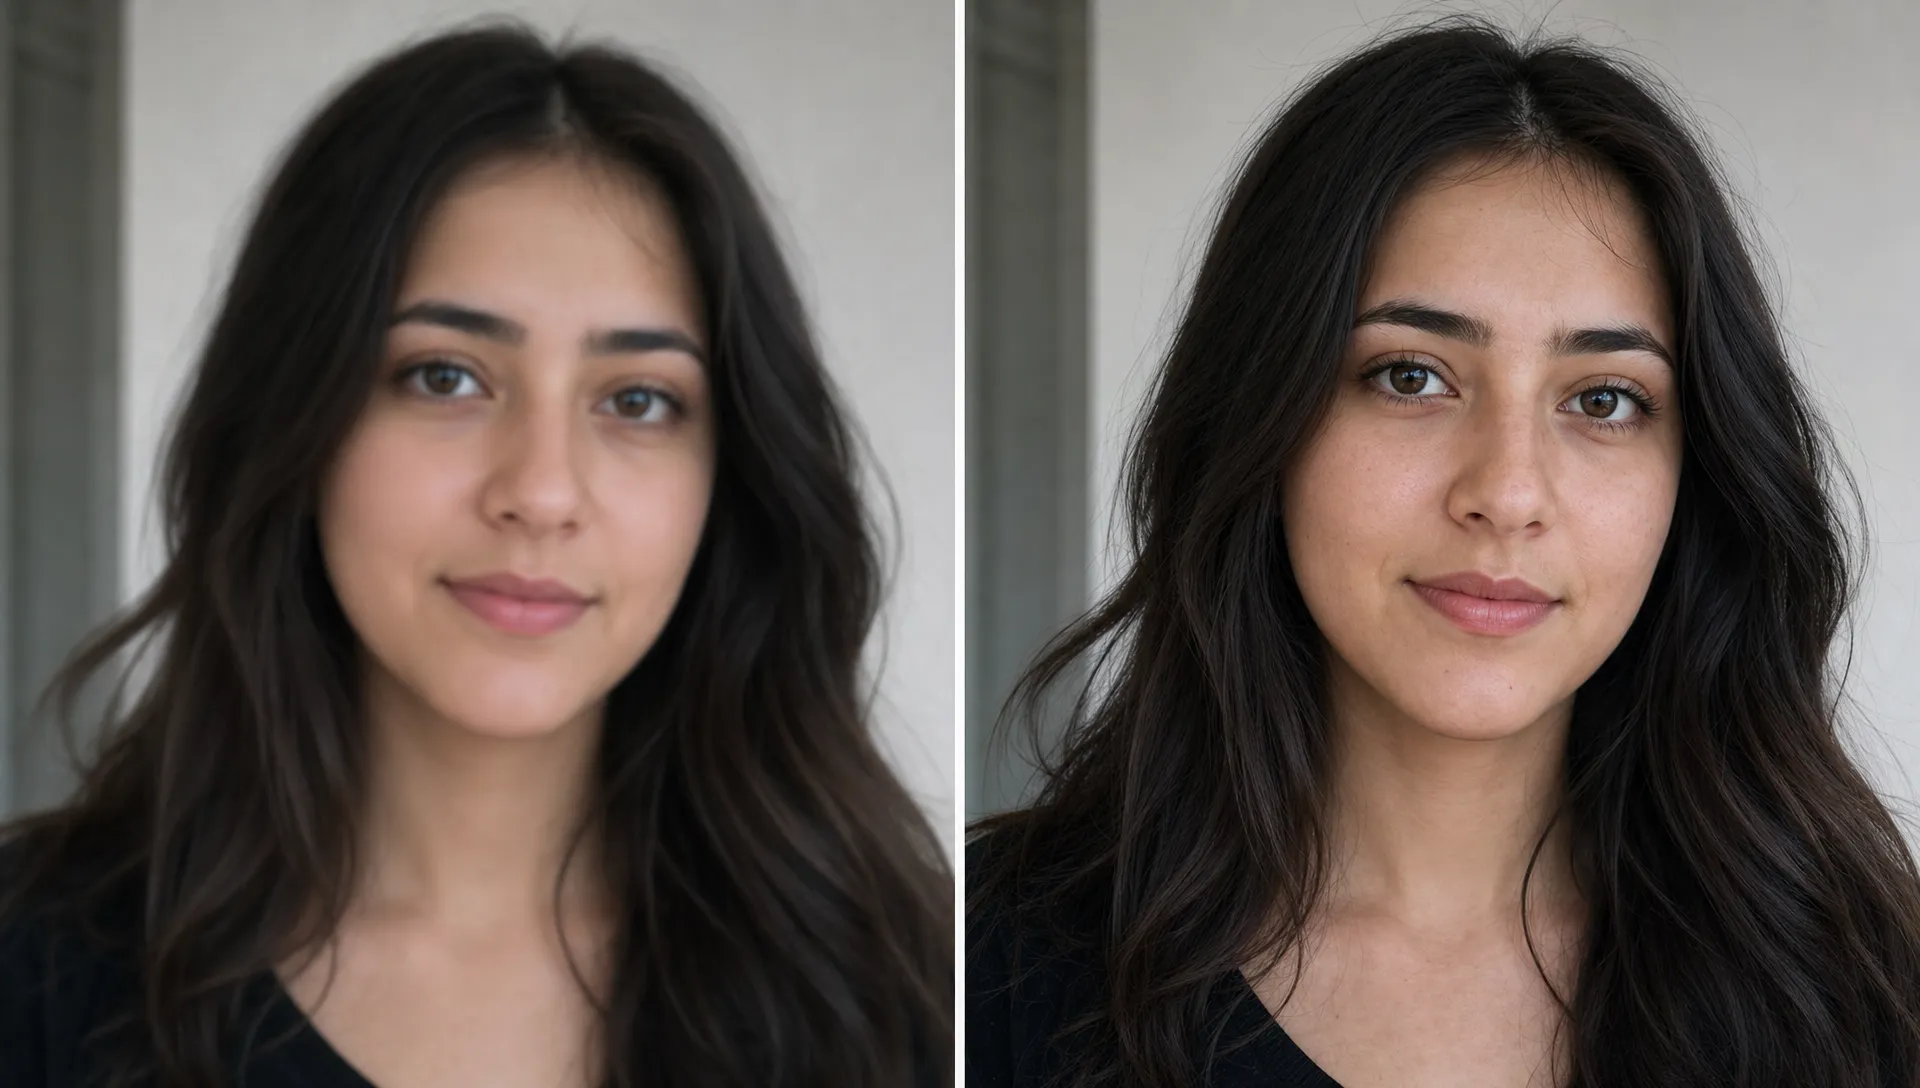
Match the enhancement to the image type
Different images need different kinds of restraint. A document scan can tolerate more edge definition than a close-up portrait. A product photo needs clean labels and realistic material texture. A low-light image needs care because the shadows may contain noise rather than recoverable detail.
| Image type | Main goal | Natural detail check | What to avoid |
|---|---|---|---|
| Portraits | Clear eyes, hair and facial features | Skin still has real texture and gradual tones | Waxy skin, over-bright eyes, crunchy hair |
| Product photos | Sharper edges, labels and surface texture | Materials still look realistic | Fake texture, glowing outlines, distorted branding |
| Documents | More readable text and lines | Letters look clear without thick outlines | Jagged text, warped characters, gray background noise |
| Low-light photos | Cleaner subject definition | Shadows look smoother, not speckled | Sharpened noise, color blotches, harsh contrast |
| Landscapes | Better definition in natural textures | Leaves, rocks and clouds remain varied | Over-sharpened foliage, haloed horizons, noisy skies |
Use this table as a quick judgment tool. If the enhanced image breaks the natural detail check, the result may be too processed for that image type.
Use a before and after checklist
A reliable workflow needs feedback. That habit is common in structured learning, where certification prep tools with readiness tracking help learners see what is working before they move on. For photo enhancement, your readiness signal is the before and after preview.
Before downloading, ask yourself whether the improved image still feels like the same photo. The best enhanced version should look clearer, not redesigned. If a viewer notices the enhancement before the subject, the edit is probably too strong.
Use these checks before you save:
- Does the subject look clearer at normal viewing size?
- Do skin, fabric, hair and natural textures still look believable?
- Are edges sharper without bright or dark outlines?
- Are shadows cleaner, or did the tool sharpen noise?
- Does small text look more readable without becoming warped?
If edge outlines are your biggest issue, review this workflow for how to unblur images online without creating halos. Halos are one of the easiest ways to spot an over-processed image, especially around buildings, shoulders, hair and high-contrast text.
Mistakes that reduce natural detail
The most common mistake is enhancing a low-quality copy when a better original exists. If the image came from a chat app, social platform or screenshot, it may already be compressed. Start from the camera roll, original download or highest-resolution version you can find.
Another mistake is stacking multiple enhancement tools. Running an image through several sharpeners can compound artifacts. The first pass may improve detail, but the second pass may sharpen noise, halos and compression blocks. One clean enhancement is usually better than several aggressive ones.
Do not judge the image only at extreme zoom. A 100% view helps you inspect artifacts, but most photos are viewed in feeds, listings, presentations or profile frames. If an image looks slightly softer at 100% but natural at real viewing size, that is often a better result than a crunchy file that only looks impressive when zoomed out.
Finally, avoid applying strong contrast and saturation changes before enhancement. High contrast can make AI sharpening more likely to exaggerate edges. If you want a stylized look, enhance clarity first, then make creative edits afterward.
What AI enhancement can and cannot recover
AI can make many soft, low-resolution or slightly blurry images look clearer. It can improve edge definition, make details easier to see and upscale small files for better viewing. This is useful for personal photos, product images, profile pictures, blog visuals and many everyday use cases.
AI cannot perfectly recover information that was never captured. If a face is completely motion-blurred, a sign is too small to read or a subject is hidden in darkness, enhancement may create a cleaner-looking version but not a guaranteed accurate reconstruction. For sensitive, legal or identification-related uses, treat AI-enhanced results as visual improvements rather than proof.
The best candidates for natural enhancement are images that already contain some usable detail. Slight blur, mild softness, low resolution and moderate compression can often improve well. Severe blur, extreme darkness and tiny cropped subjects have harder limits.
Frequently Asked Questions
Can I enhance images free without creating an account? Yes. ImageSharpen lets you enhance images directly in the browser without sign-up or software installation, which makes it useful for quick sharpening, unblurring and resolution improvement.
How do I keep skin texture natural when enhancing a portrait? Start with the original file, avoid stacking filters and compare the before and after preview closely. Eyes and hair should become clearer, but pores and facial tones should not turn into a smooth plastic surface.
Does upscaling an image make it look less natural? Not necessarily. AI upscaling can improve low-resolution images when the source has enough detail. The result looks unnatural when the tool exaggerates texture, sharpens noise or invents edges that do not match the original.
What file types can I enhance with ImageSharpen? ImageSharpen supports JPG, PNG and WEBP uploads up to 20MB, which covers most common photos, web images and exported graphics.
Can AI fix every blurry photo? No. AI can improve many soft or mildly blurry photos, but it cannot perfectly restore detail from extreme motion blur, severe compression or information that was never captured by the camera.
Try a natural-detail enhancement workflow
If you want to enhance images free without making them look artificial, start with a clean source file, use AI sharpening once, compare the before and after preview and download the version that looks clearer while still feeling real.
You can test the workflow now with ImageSharpen. Upload a JPG, PNG or WEBP image, enhance it in the browser and use the preview to choose a result that improves clarity without losing natural detail.